Goat Milk
Before I came to Rancho Delicioso, my boyfriend Roland and I had begun to experiment with making our own dairy products…yogurt, feta, and cream cheese. While they were great tasting, without a cow or a goat, they were actually far more expensive than to just buy the item at the store.
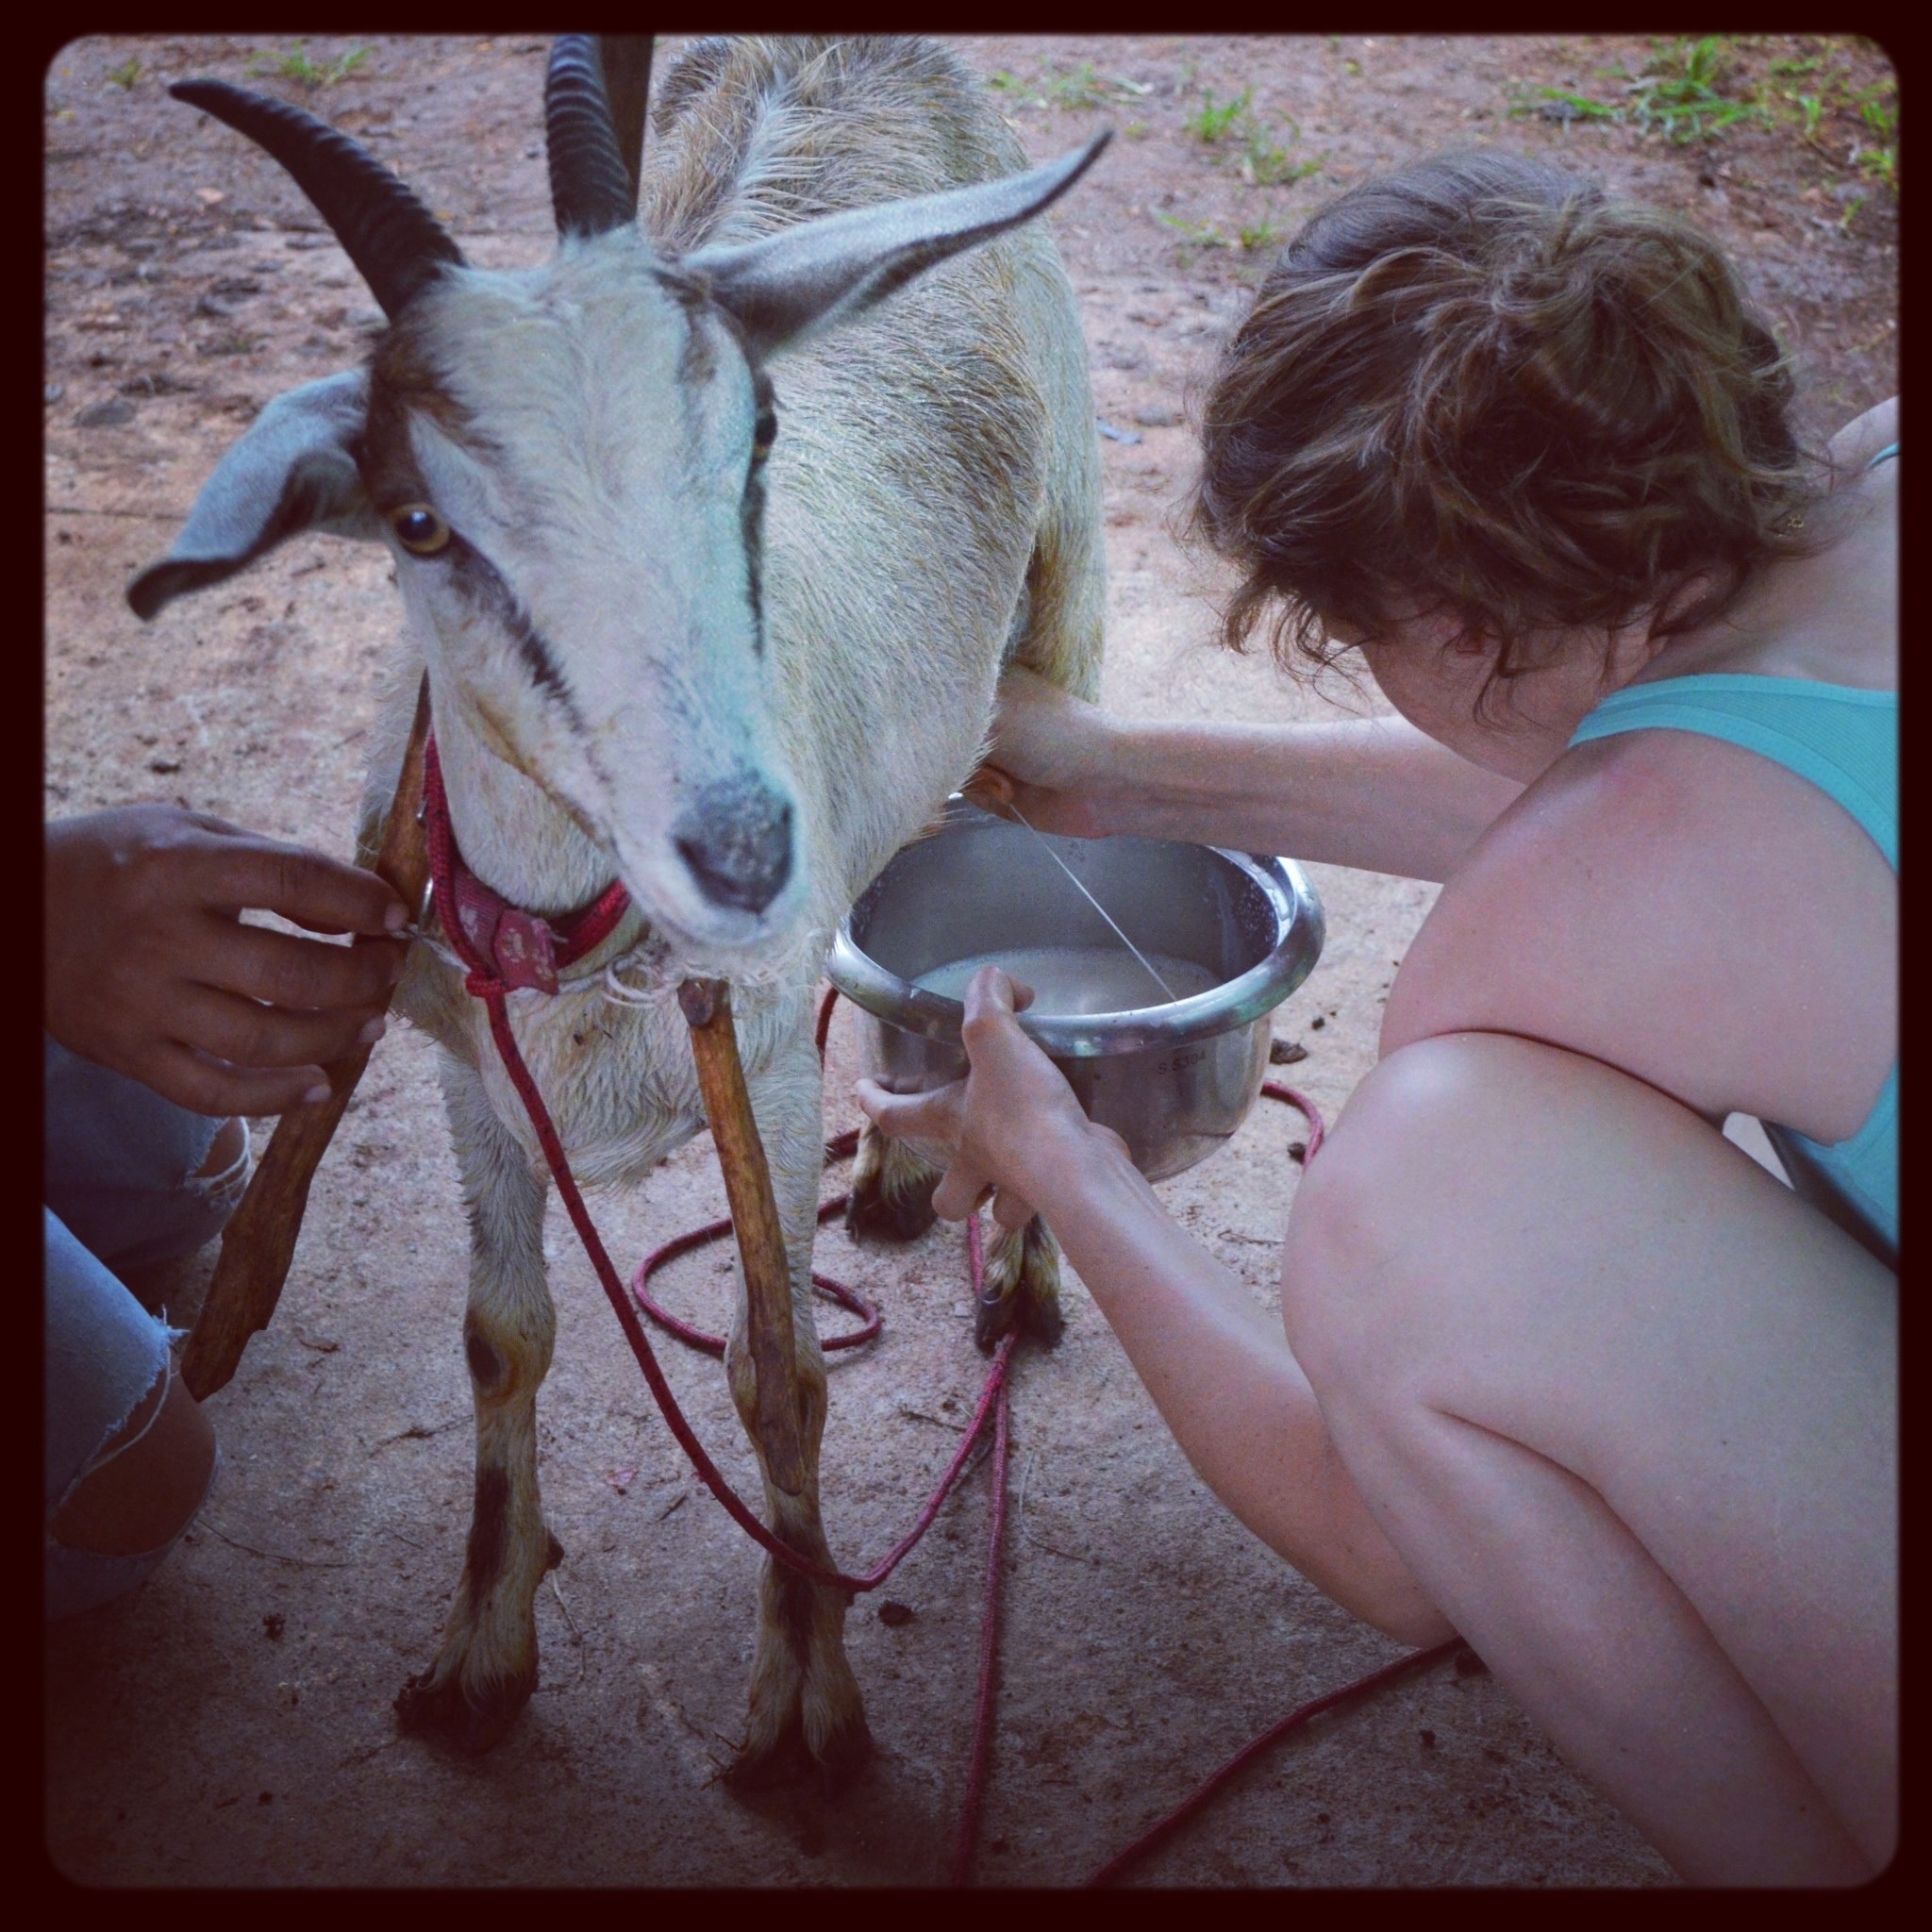
But now I have a goat! Okay, the goat isn’t mine but Julio has taught me how to milk the goat, so every morning around 7am I take my bucket and get to milkin! At first I couldn’t get through the entire milking as my hand would be screaming in pain, but I’ve gotten a lot better and now I’m working on perfecting the two-handed milking.
We get about a quart of milk each day, so after 2-3 days it’s time to make some dairy products. We first tackled yogurt making, which is actually quite simple, something Dannon and Yoplait hope you don’t discover.
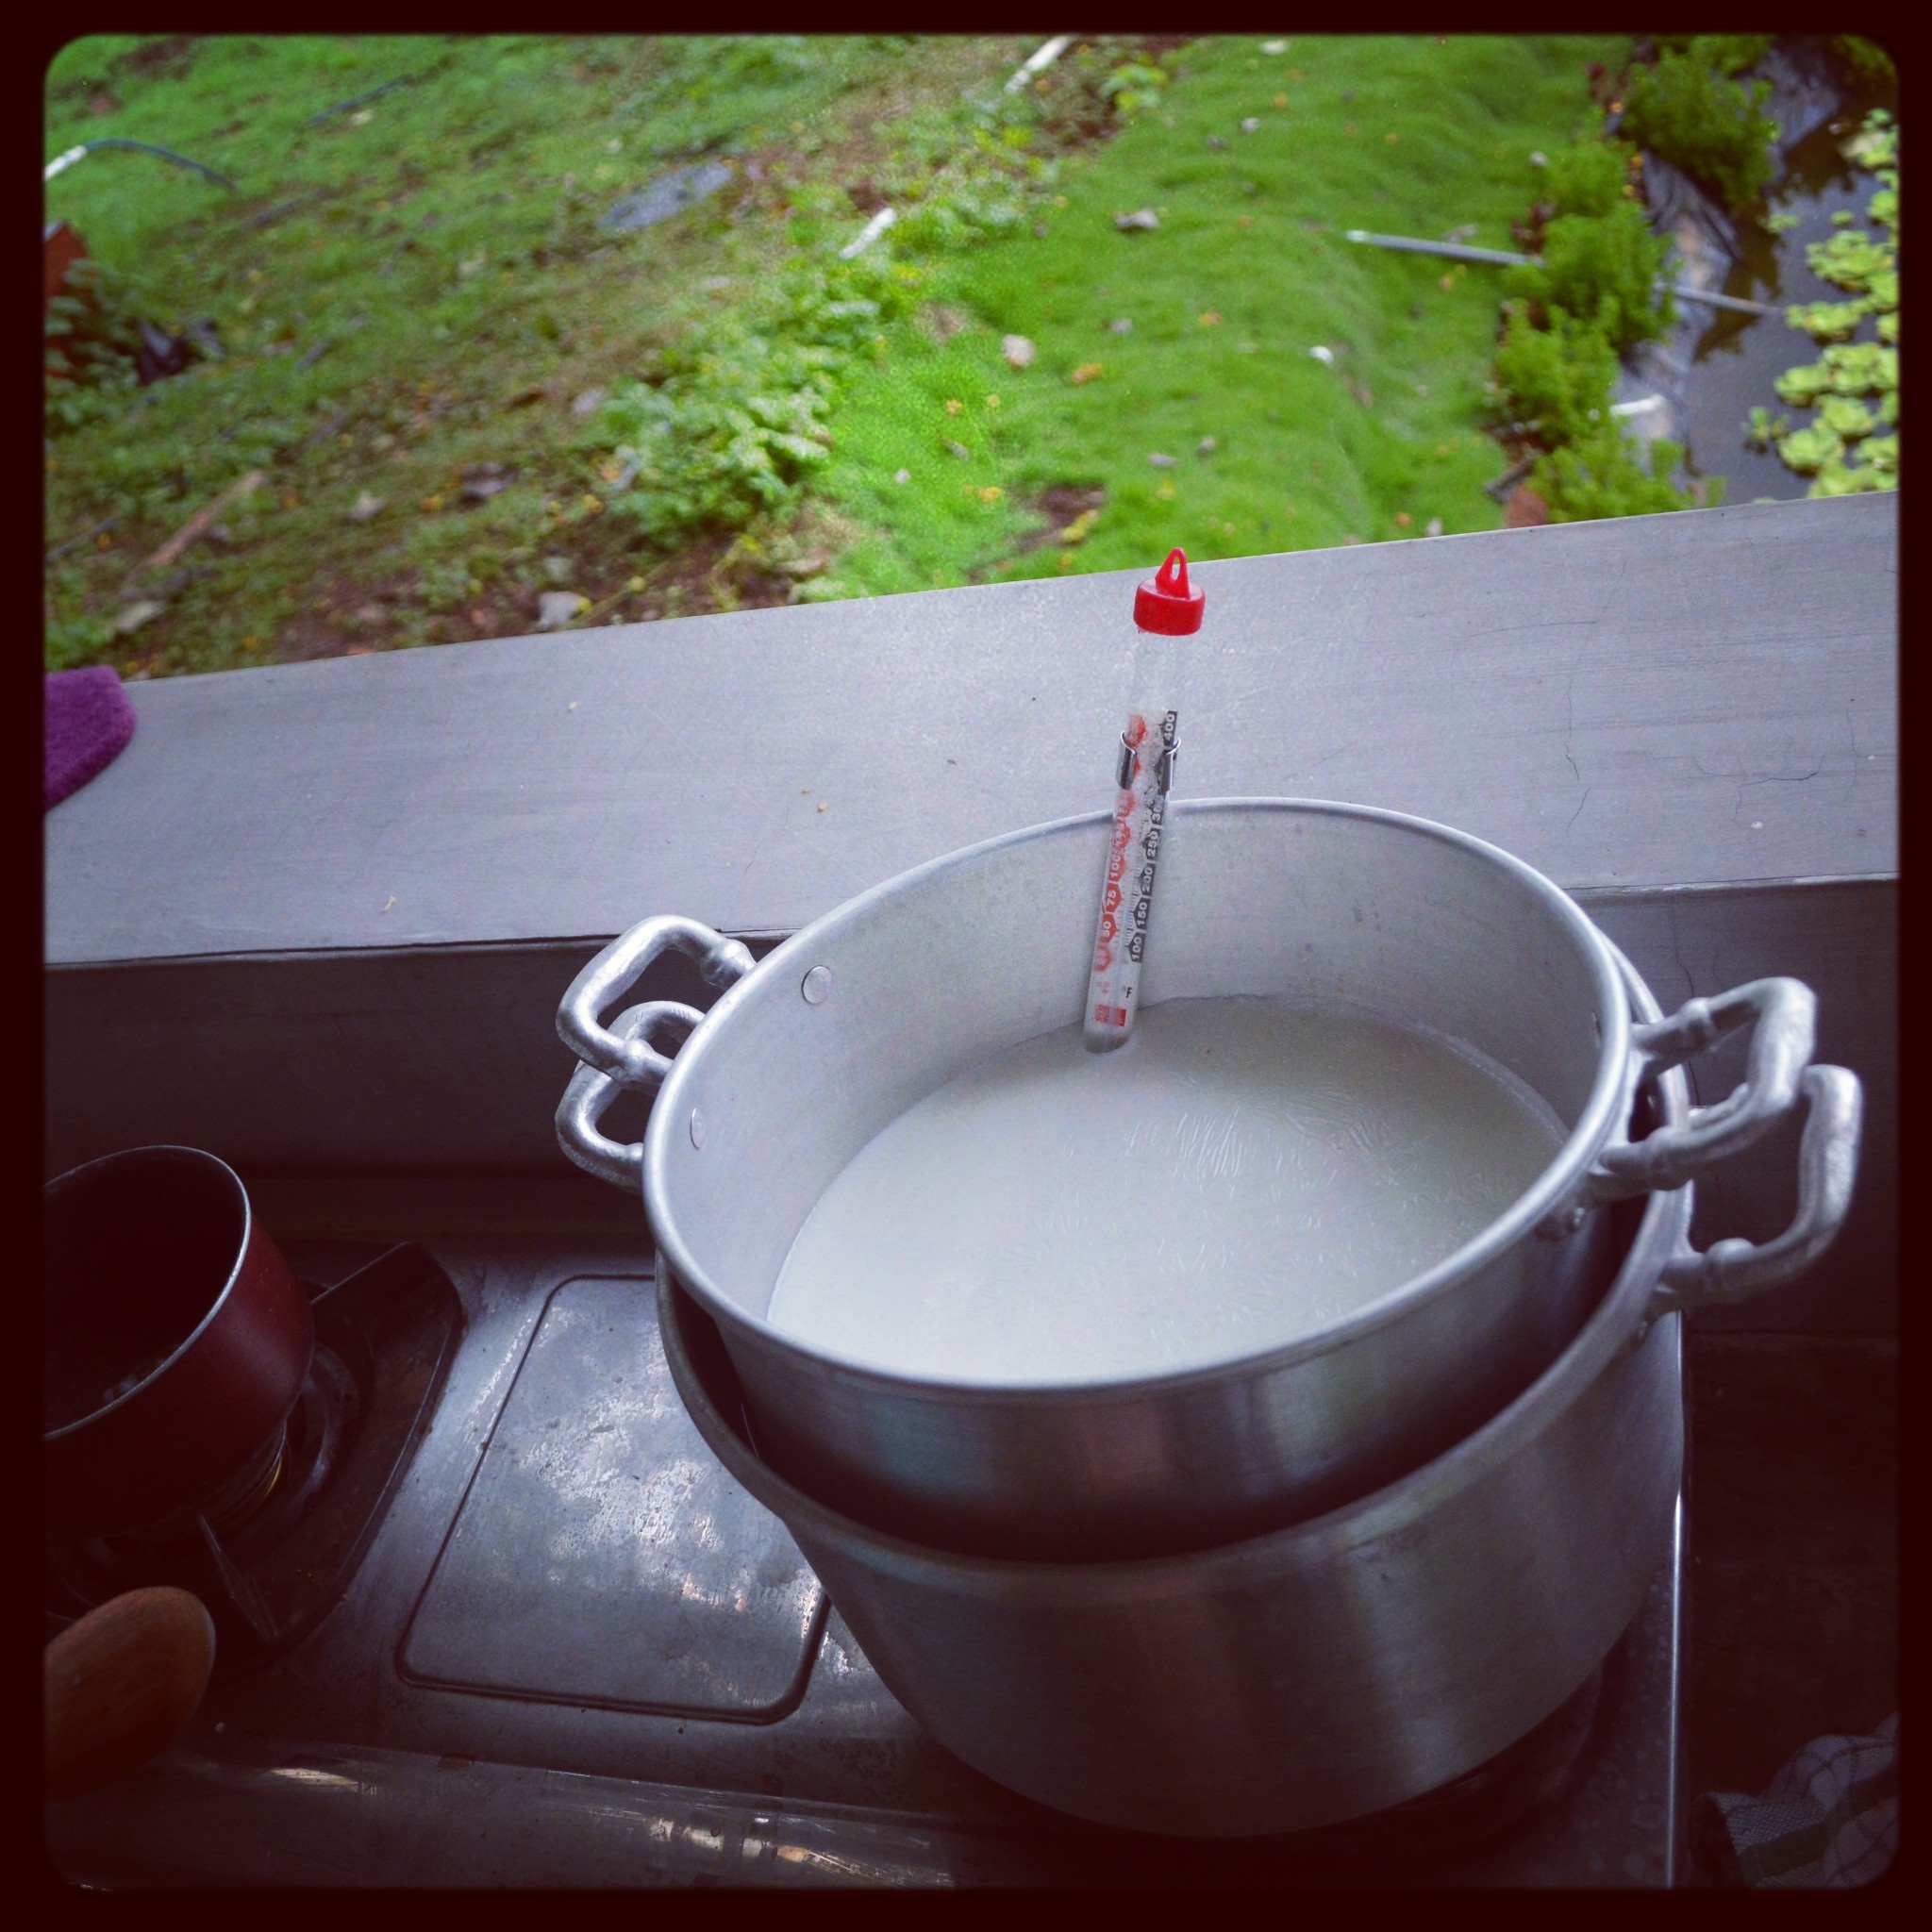
#1 Heat the milk (goat, cow, nonfat, whole) up to 185 degrees
#2 Let the milk cool to about 110-115 degrees. You can submerge the pot of hot milk in an ice bath, or just let it sit, stirring it to help it cool. It’s important that the yogurt cools properly before adding your culture as if it is too hot you will kill your culture and be left with a big pot of warm goats milk. 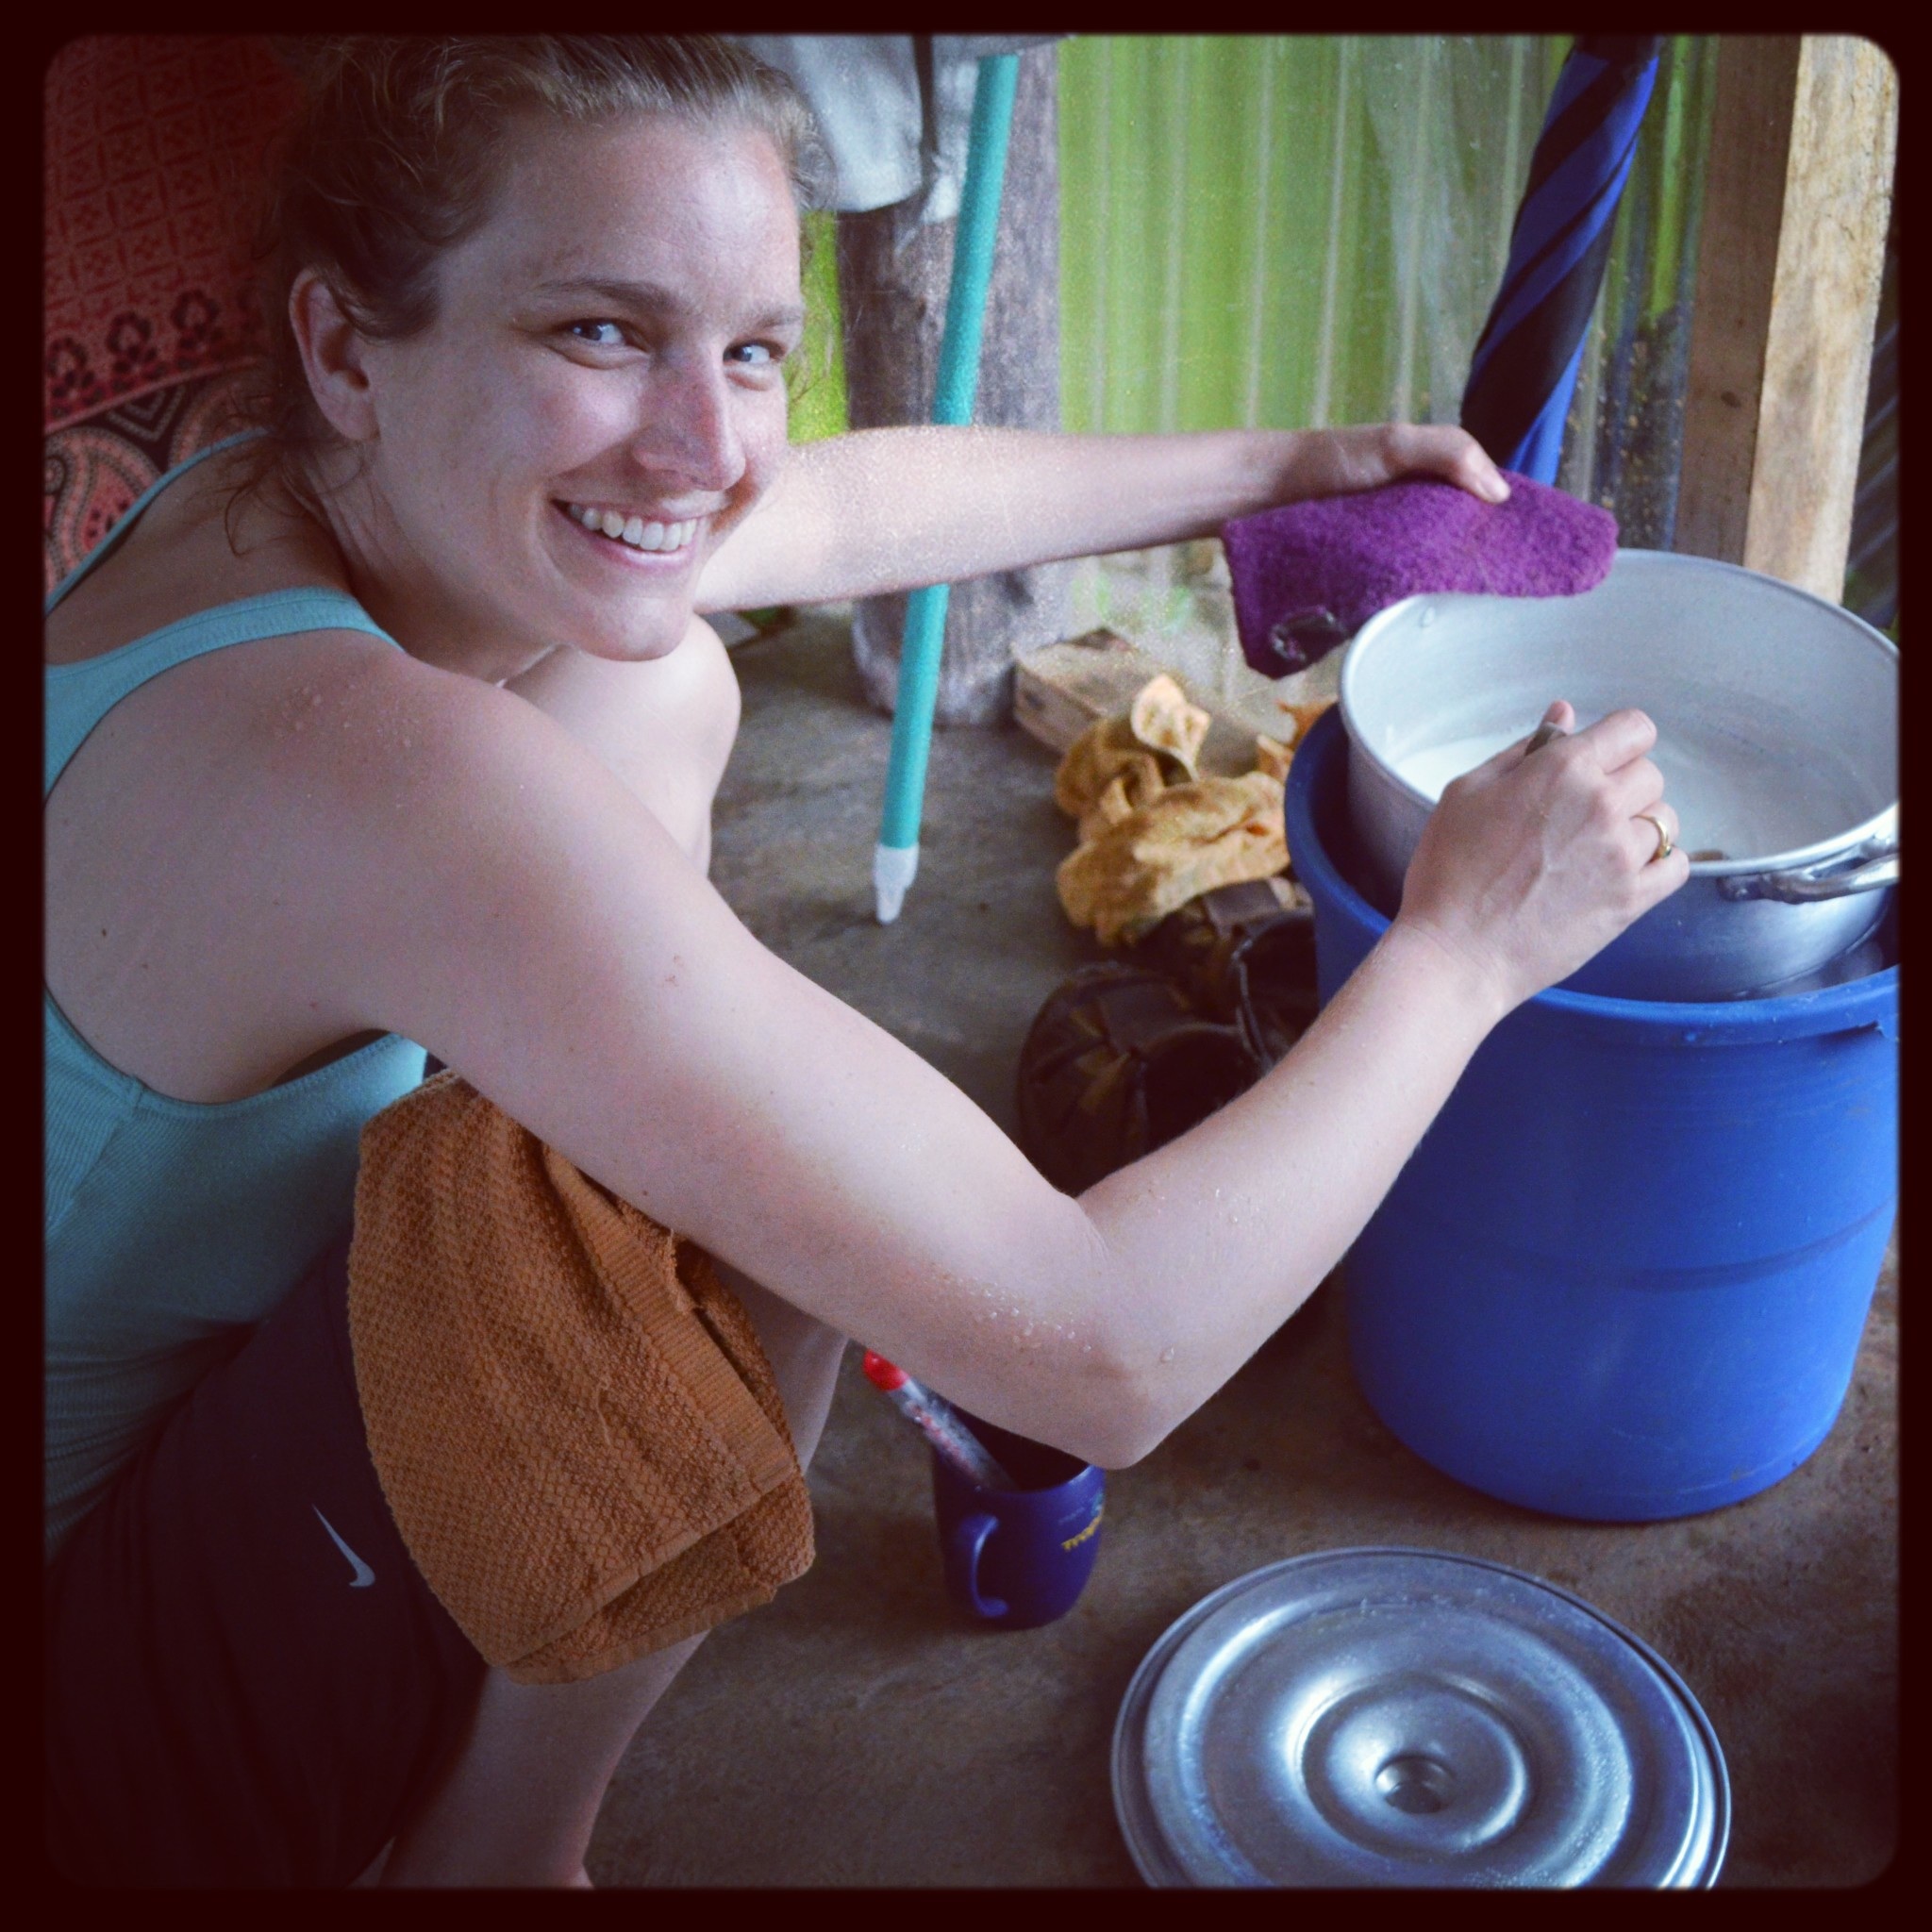
#3 Add the yogurt culture, which is just plain yogurt. That’s the amazing thing about yogurt, as long as you save a little yogurt from your last batch you have all you need to start a new batch. Although eventually, you may need to buy a fresh batch of yogurt from the store as over time the culture can weaken, but that only results in thinner yogurt so it isn’t the end of the world. You add about 1/4 cup of yogurt for each quart of milk you are using.
#5 Stir the yogurt into your warm milk mixing well.
#6 Let sit at 100-115 degrees for 8-12 hours. The longer you let it sit the more tart the yogurt will become. There are many ways to maintain the proper temperature, we put it in the dehydrator at 110 degrees and forget about it, you can also wrap a heating pad around it, put it in a warmed oven with a pilot light on (if the oven has a light turn it on as it will help warm the oven just a bit), put it in a cooler filled with warm water. Anything that keeps the temperature at roughly 100-115 will do, if the temp drops for a little while its not a big deal, but the cultures won’t be working, just be careful about letting the temp get too high which can kill the cultures.
#7 After your desired tartness has been reached – you’ve got yogurt! Pour off any whey (liquid portion) that has separated, take a big spoonful and enjoy. It will thicken a bit as it cools in the fridge.
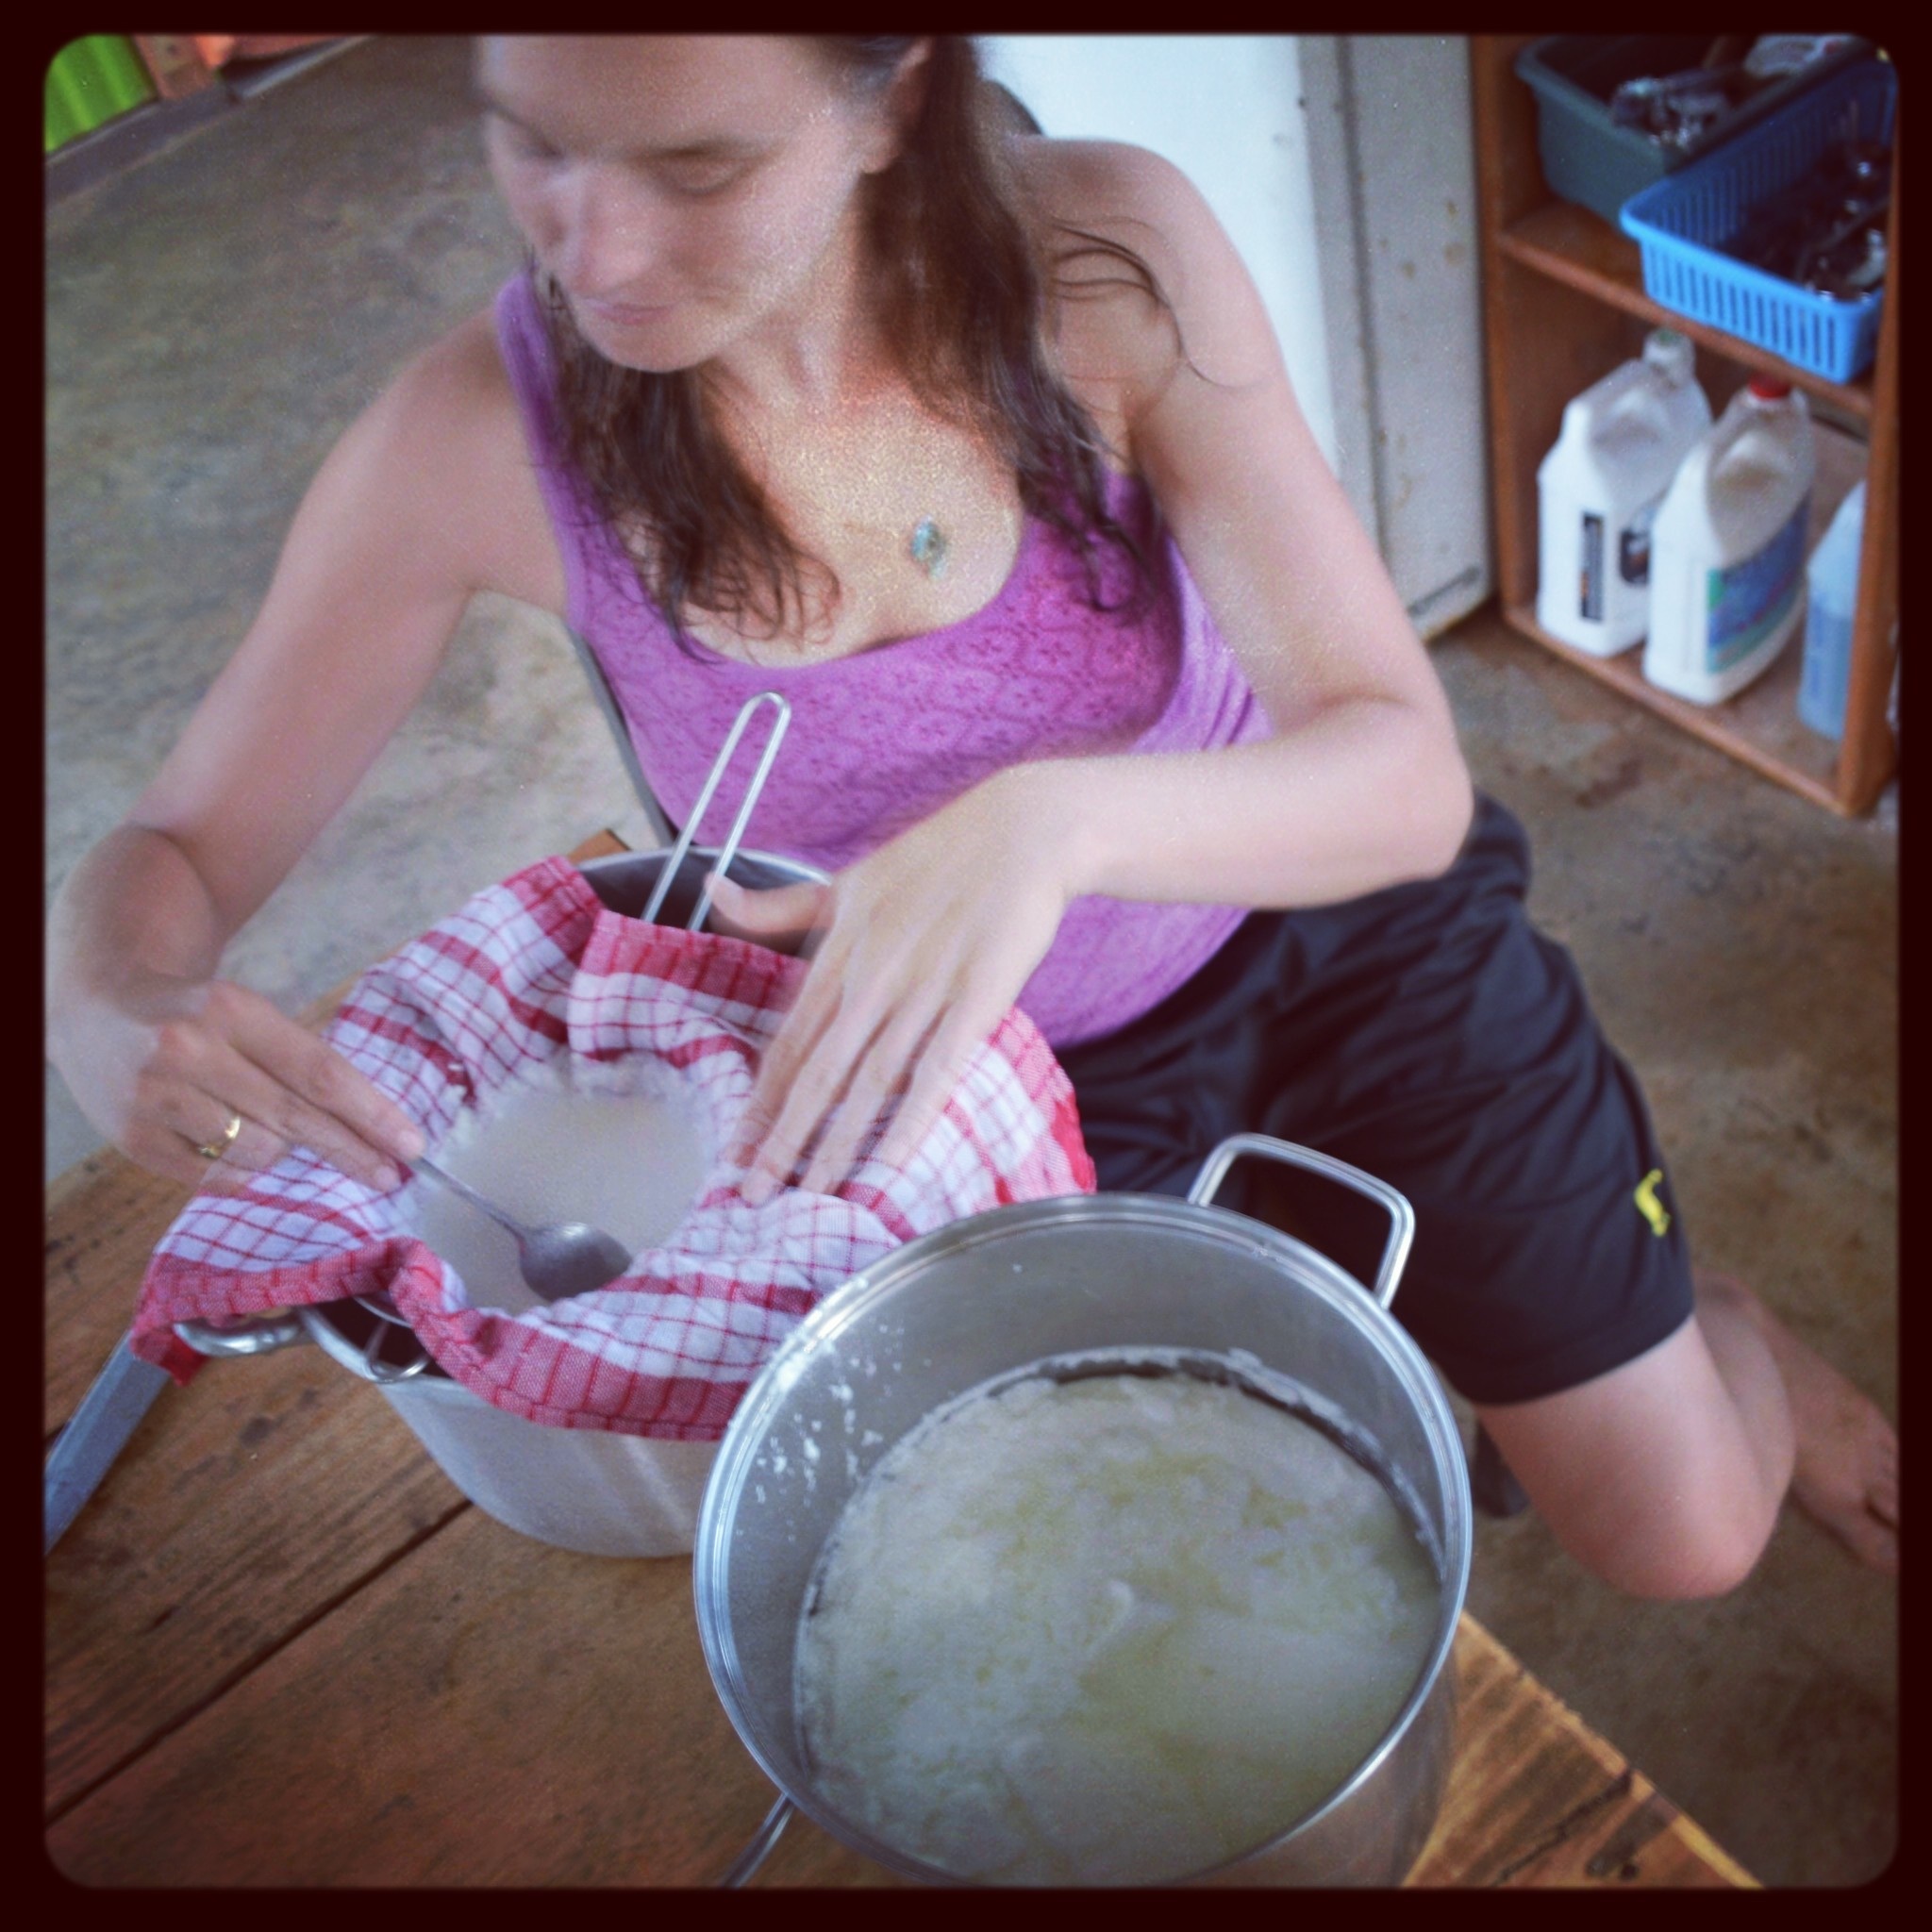
# 8 (Optional) If you are like me and enjoy thick yogurt then line a colander with a clean (best to have not washed with fabric softener or dried with drier sheets as the taste will come through) dish cloth, butter muslin, or layered cheesecloth. Pour your yogurt in and let additional whey drip out, which results in thicker creamier yogurt. There is no set amount of time but I find that after 4 hours it reaches a good consistency, but it is up to your personal preference. This step should be done in the fridge which slows down the cultures and stops your yogurt from getting tangier. The whey that drains off is packed full of additional protein, calcium, vitamin B-2 and amino acids and can be used in soups, cooking pasta or rice or any other recipe that calls for a liquid, or if you have chickens they love it!
There are lots of variations and different ways to make yogurt, this is just what I have found to work, Google homemade yogurt and you’ll find all sorts of different ideas.